Thursday, July 5, 2012

Tied in a Bow Maxi

In case you missed it I was a guest post on Melly Sews. Here is the tutorial in case you missed it.


This dress is simple with an empire waist, ruffled hemline, and braided neckline. It is light and comfortable, perfect for summer.
Materials:
-2 yards of fabric (maybe more depending on how tall you are)
-1/4 inch elastic
-liquid stitch
-thread


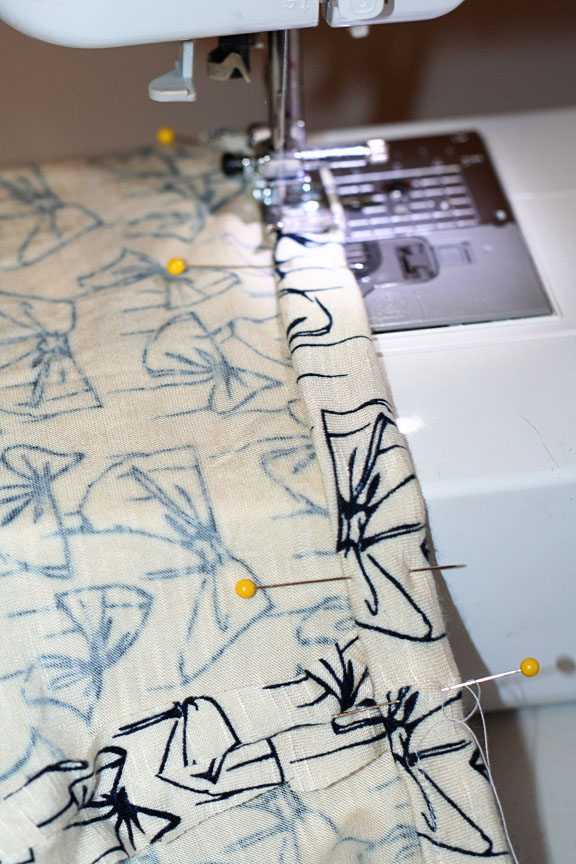
***Make sure to finish off all your seams with a serger or zig zag stitch.


HOW TO:

MAKING YOUR PATTERN:
1. Start by taking some measurements. You will need to measure the length of the skirt portion of the dress. Start underneath your bust line and measure to the length you desire leaving at least 6 inches for the bottom ruffle. Remember to add 2 inches for hem lines. Then measure around under the rib line where your skirt will begin. Add 3 inches to the width for gathering and seams. Then you will measure the bottom portion of your skirt. My skirt portion was 37" long by 26" wide at the bottom. Fold your fabric in half and cut your skirt pieces starting at the top of your skirt and diagonally cutting to the bottom of your skirt. Then cut a second piece that matches the first.

2. Now cut the bottom ruffle. 2 rectangle pieces 8"x53".

3. Next you will make the bodice portion. I used a tank top. The length was 8 inches (again up to you). The back side is just a rectangle the same height as the front starting under the arm.

Here are your 2 pieces.

4. Now cut 3 long strips 1 1/2" wide. Pin at the end and braid all the strips together. I didn't measure the length I just wanted to make sure I had enough for 2 braids around the front neckline and 2 braids crossing in the back.


 5. I also made some piping to go around the neck line, under the arms, and across the top of the back bodice. For tips on making piping check out this post by Prudent Baby.

PUTTING IT ALL TOGETHER:

1. Sew your bodice pieces together at the side seams RST using a 1/2" seam. Now sew all the piping around the top of the dress. I started with the middle of the neckline. Then I added it under the arms and across the back piece of the bodice.


 2. Now with RST sew the skirt portion of the dress at the side seams using 1/2" seam. Next fold over the top of the skirt portion 1/2" and press. Then fold another 1/2" and press. Top stitch the fold down to create your casing for your elastic. Remember to leave 1/2" space to thread your elastic through.
 Measure your ribcage where you want the bottom of your dress to start and cut the elastic piece to that size. Using a safety pin thread the elastic through the casing. Sew the elastic together at the ends and close up your casing. Now with both the bodice and the skirt turned inside out, pin the skirt to the bodice top with the top on the outside of the skirt. (Hint: floor, skirt, bodice...does that make sense?) Using a zig zag stitch, sew the skirt to the bodice right underneath the elastic. This will provide the stretch that you need).
 3. Take your bottom ruffle pieces and sew them together on the sides with RST and trim the access fabric. Now you should have a large circle. Using a loose gather stitch sew all along the top of the ruffle pieces leaving the ends long. Gather your ruffle piece until it is the same size as the skirt portion of your dress. Pin the ruffle in place about 1" from the bottom of your skirt with the ruffle on the top. This part is tricky to keep the ruffle level all around the bottom of the skirt. Sew along your gather stitch (attaching the ruffle to the skirt).

 Turn the bottom of the ruffle under 1/2" and then another 1/2", press and sew down. I used a double needle for a nice finished look on the hemline.

4. Now you can finish the top. Find the middle of the bodice front and pin your braid in place under the piping. Then take your second row of braid and pin underneath the top row tucking the ends underneath the top row. **I sealed the ends of the 2nd braid with a zig zag stitch or serger. Now sew the two ends together just to hold them in place. Using liquid stitch I glued the braids to the top of the bodice.
 
Once that is dry put on your dress and measure how long you want the braids to be in the back after criss crossing. Pin and sew the braid ends to the back of the dress (again I sealed the ends).


DONE!

I like the stretch and the extra tummy room but this dress will be great for even after the baby comes.
Thanks for having me Melly I sure do enjoy Summer Sundresses.


Monday, June 18, 2012

Peek-a-boo Pattern Shop Review

I love finding new patterns. Especially online patterns. Sometimes online patterns can be tricky depending on the writer. Let's face it, without proper training writing a pattern can be confusing to the reader. I have no sewing training so sometimes when I make my own pattern I create the piece in a way that is not always "correct" sewing techniques or even the simplest way. But it is always fun to try new things, that is how we learn.

Recently I have been doing a lot of work for Amy from Peek-a-boo Pattern Shop. She has a ton of patterns in her shop and I have been lucky enough to test a few. I do not always agree with her directions but I have learned a lot about pattern making from reading and reviewing her patterns. Here are a few of the patterns I have made recently that I love:

ADELE SKIRT
 HARPER DRESS
 JULIANA DRESS
 BUBBLE SHORTS

Writing a pattern is a tremendous task and not as easy as it may seem. As I said we don't always agree on how the pattern should be done but the end product is ADORABLE!

Saturday, May 26, 2012

Butterfly Jumper

I love summer dresses. The ideal summer dress is light and airy, with bright colors or summer themes. This week I designed a summer jumper for my daughter with butterflies on the font. It uses classic summer prints and textiles: cotton and eyelet.

It is basically a bib front with a full skirt. The skirt is connected in the front to the bib and gathered by elastic in the back. Then I added straps just to keep the dress in place.


 Maybe I will make a pattern for this jumper. Would you be interested? Are you working on any dresses to get ready for summer?


Tuesday, May 22, 2012

Welcome to the Blog


Hello everyone, thanks for coming to check out my blog. I am one of the co-authors of A Couple of Craft Addicts but I wanted to start my own path and create a blog where I can share my sewing projects as well as parenting experiences. Right now I am a mom of 2 children with my 3rd on the way due in October. I love my children and love that I have the opportunity to stay at home to raise them. I am a member of the Church of Jesus Christ of Latter-Day Saints and that has been a major influence in my life. I like to think that the Lord guides my decisions and helps me to know what is most important in my life. My children have also helped me to grow as a person and a mother. My husband is my biggest supporter in all my sewing and crafting endeavors. I am a very lucky person and I can't wait to share my experiences with all of you.

Monday, May 21, 2012

Guest Posting at Mama Says Sew

This week I am guest posting at Mama Says Sew. Over the next two weeks Terra is going to feature some fabulous sewing projects and a few great giveaways as well. Please go and check out my bow top tutorial on Friday and visit my shop next week if you want to buy the pattern.